How do I schedule the same Playlist across multiple displays?
You can do this in two ways:
- Repeat the scheduling operation manually for each display
- Create a display group and schedule the playlist directly on the group
Not sure how to create a display group? Click here to learn how
How to schedule a playlist
In Livesignage, you can schedule playlists using two different methods:
- from the display settings
- or directly from inside the playlist
Option 1 – From the Display Management Panel
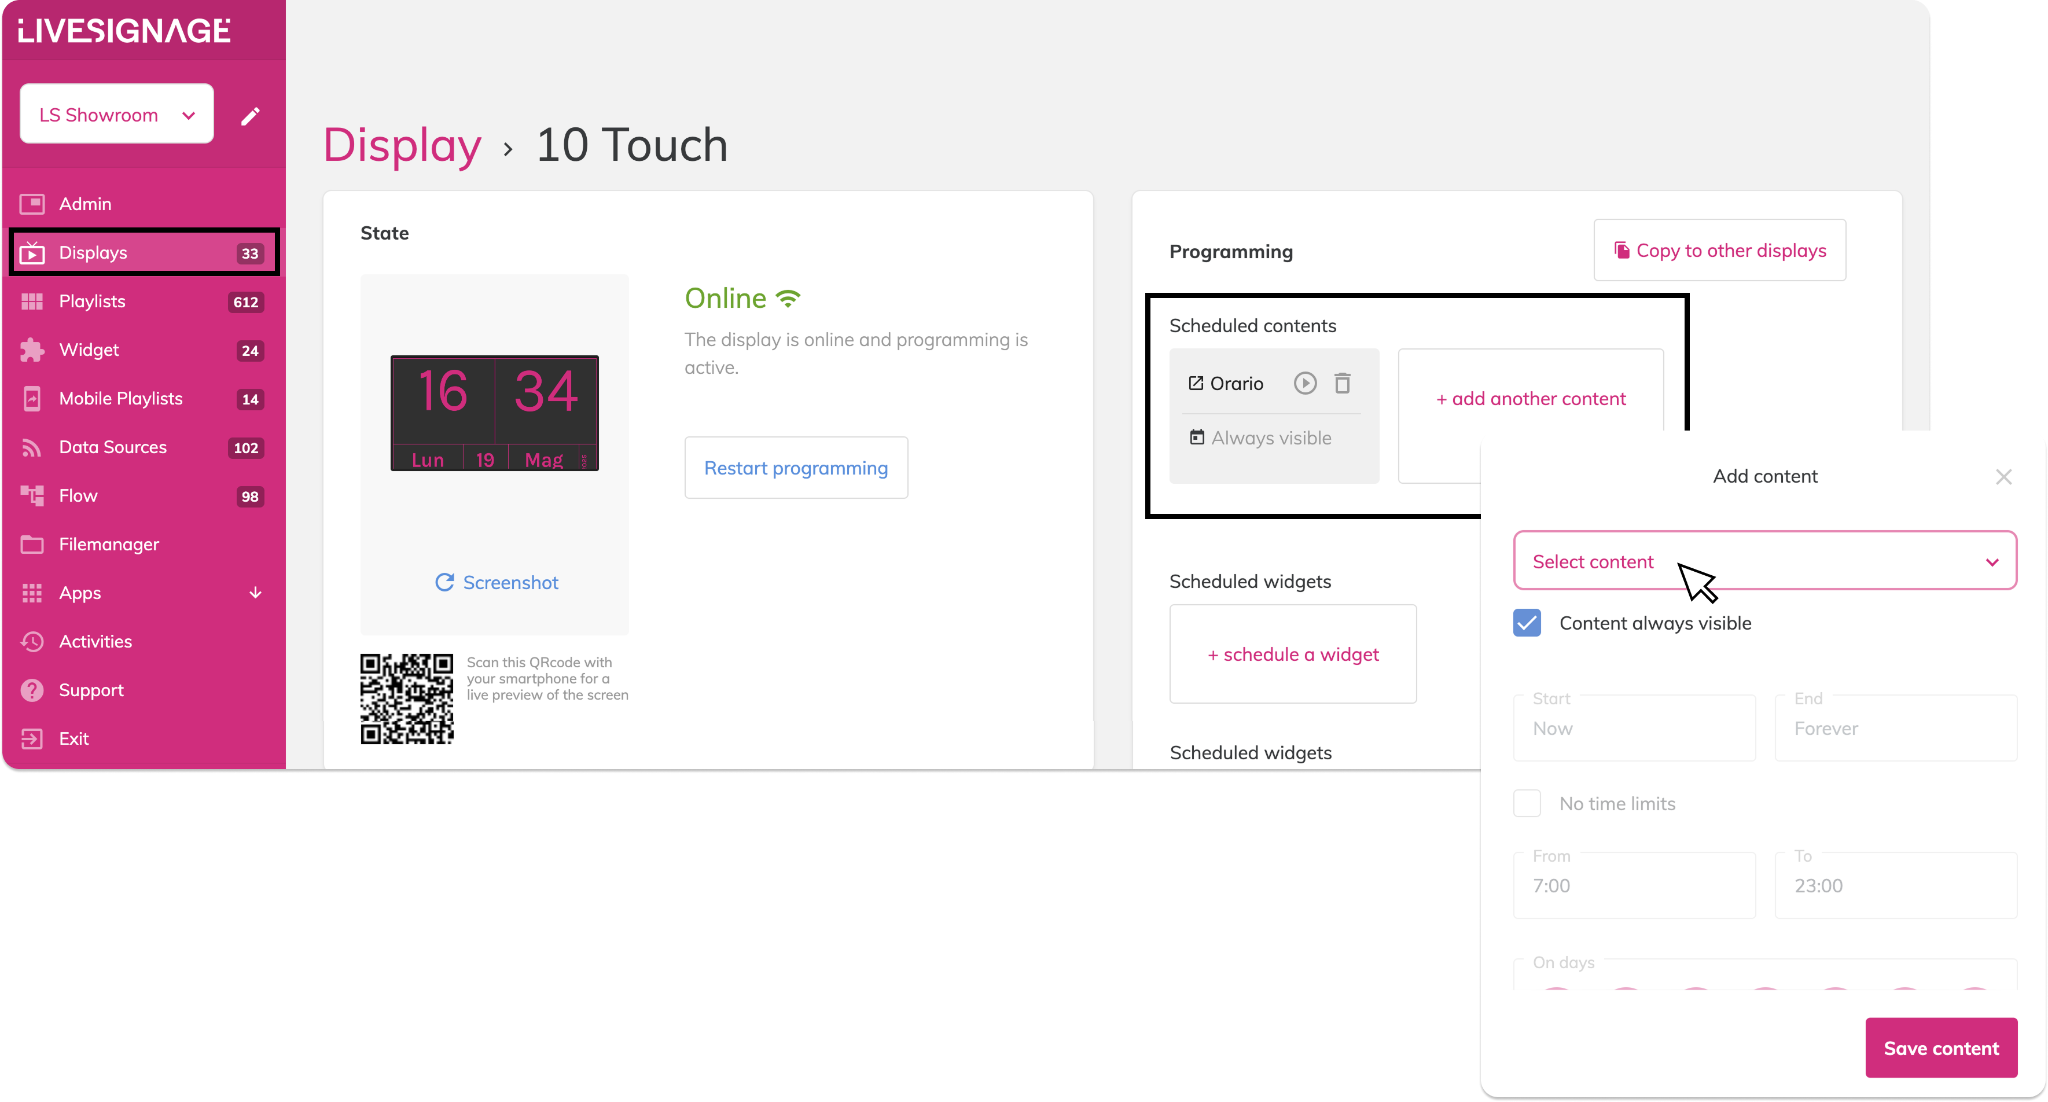
This method is useful when assigning playlists to one or more displays or checking active content quickly.
- Go to the Displays section in the left menu
- Click on the display you want to manage
- Under the Programming section, click + Add another content
- Select the playlist from the dropdown
- Choose the visibility: always visible, or scheduled by time/day
- Click Save content to apply the changes
Great for managing multiple displays individually from a central view.
Option 2 – From Inside the Playlist
Use this approach when you want to control the exact scheduling from the playlist itself.
- Go to the Playlists section and open the playlist
- Click the calendar icon 📅 in the top-right
- If no schedule exists, clickAdd schedule
- In the popup:
- Choose the target display or a display group
- Set the time ranges, dates, and days of the week
- Click Save programming
Ideal when timing needs to be precise or limited to specific hours.
Notes
- You can view and edit existing schedules from both the display and playlist views
- Scheduling a playlist does not duplicate it—it just controls when and where it appears